Friday, August 30, 2013

Counterpoint to the Rippetoe Article: The Not-So-Evils of High Rep Weightlifting

Excellent counterpoint to the Rippetoe Article:
The Fallacy of High Rep Olympic Weightlifting.

Check out Juggernaut's Become Unstoppable Seminar at CrossFit Tustin on October 12-13th where programming and technique for powerlifting, weightlifting, strongman, mobility and more will be covered!

Primal Exercises Everyone Should Do

These aren't "invented exercises" these are movements that we all are called up to do everyday in our activities of daily life.

Primal Movement Concept

Lets look at what you would have been doing, say 10,00 years ago in your daily life:
Walking long distances to find food and water.
Running to catch prey or running to avoid being prey.
Chopping down, splitting and moving wood.
Building things, with your hands and basic tools

All of which are multi-joint compound movements.

This model is different from what the typical globo-gym/big box goer does today.  His life is primarily sedentary with occasional, lets say 3 gym visits per week. When he does go to the gym he sits on machines that guide and help move the weight for him. Think about the guys doing bench presses and curls (every Monday, which seems to be National Bench Press Day) his muscles tend to be imbalanced due to too much pressing and not enough pulling.  His legs are underdeveloped (remember squats are hard).  Or think about the runner who does nothing but run, or the cardio queen who puts in hours on the elliptical.

Our bodies are an amazingly complex web of interconnected muscles, joints, fascia, ligaments, tendons, bones, and other tissues and organs that work synchronously and seamlessly. When we are lean and fit, every cubic centimeter of our bodies has a purpose, a function to help us survive and thrive.

So, if the body is this interconnected web that’s really more like one unit, one muscle, why would we focus on only one muscle group during a workout or one type of exercise activity? The idea of focusing on only one muscle group in a workout is definitely not efficient, nor is it athletic. At Functional Fitness and Performance we believe you should focus on movement patterns, not muscle groups, when exercising to develop a functionally strong body. At its core, exercise is all about movement.

We’re laying out the 7 basic, primal movement patterns you should use at least once per week and that form the foundation of the workouts & exercise programs we develop.

Movement Pattern #1: Squat

A squat is a movement pattern where you plant both feet on the ground, then bend your legs to lower your body down while keeping your chest up and lower back straight. We use squats in our daily life such as squatting in and out of a chair. As we age, an inability to squat can very negatively affect our quality of life.

As an exercise, you can provide resistance to a squat from the front of your body (like holding a dumbbell or kettlebell, called a goblet squat), on your back with a barbell, from the sides holding dumbbells, or on the entire upper body by wearing a weighted vest. With each method of resistance, the lower back and abs must contract to keep the body upright as the body is lowered down. The most common reason why people have trouble squatting is because of tight hip flexors or tight calves.

Squat Exercise Examples:

Air Squat
Goblet Squat
Back Squat
Front Squats - Upcoming in the Squat Series Squats Part 6, for now look at this link

Primal Movement Pattern #2: Push

A pushing exercise requires pushing external weight away from your body, or your center of mass away from the ground, like in a push up. Pushing yourself off the ground to get up, or pushing a toolbox overhead to put it away in a cabinet, are both pushing movements used in our daily life.

There are two primary types of pushing movements (1) vertical push and (2) horizontal push.2 A vertical push is a DB shoulder press where you press a dumbbell vertically over your head. A horizontal push is pushing a weight away from your horizontally, like in a DB Chest Press as you lay back on a bench. A vertical press tends to emphasize your shoulder muscles while engaging the back of the arms (triceps) while a horizontal press emphasizes the chest, while engaging the shoulders and the back of the arms.

Exercise Examples:

Push Ups
Barbell Shoulder Press
DB Incline Press

Primal Movement Pattern #3: Pull

A pulling motion is the opposite of a pushing motion, in that you are pulling a weight towards your body, or pulling your center of mass toward an object, like in a pull up. From pulling down a branch to reaching for an apple, to starting that old boat motor, pulling is a movement we use our daily lives.

There are two primary pulling movements, a (1) vertical pull and (2) horizontal pull. An example of a vertical pull is a pull up, which is a classic exercise that develops strength in your back, shoulders, biceps, and even core. An example of a horizontal pulling motion is a single arm dumbbell row.

Exercise Examples:

Pull Ups
TRX Body Row
Single Arm DB Row

Movement Pattern #4: Twist

Of all the exercises listed so far, they are completed in two planes of movement, either forward, or to the side (saggital and frontal planes). But there is a third plane of motion which makes exercise much more functional – the transverse plane, or twisting motion.

If you think about lunging down and reaching across your body, or throwing a ball, running, or even walking, most human movement has some element of a rotation involved. The problem, however, is that most exercises we do in the gym have no rotational component.

There are two primary types of twisting, or rotational movements: (1) rotational and (2) anti-rotational. Rotational movements are the basic twisting exercises, such as twisting to throw a ball. Anti-rotation are exercises where the rotational movement is prevented, like in a paloff press, or a single arm DB row.

Exercise Examples:

Cable Wood Chops
Palloff Press
Medicine Ball Throws (standing sideways against a wall)

Movement Pattern #5: Bend

Bending is a movement pattern where you bend your torso by hinging your hips. A very common movement, we use it in our daily lives by picking up a baby off the ground to trying to lift that heavy suit case.

Bearing the brunt of the weight on your hips, glutes, and legs is the key to lifting weight in a bent over position. This is done by keeping your low back in a neutral, to slightly arched position, as you bend over to lift an object off the ground. If you round your back, significant pressure can be put on your intervertabral disks, which may cause a disk herniation.

Exercise Examples:

Kettlebell Deadlift
DB Clean and Press
DB Stiff Legged Deadlifts
Deadlift

Movement Pattern #6: Gait / Combination

Walking, jogging, or sprinting is called a gait, which requires pulling, lunging, and twisting motions to propel the body forward. Whether you are sprinting to catch the train, or walking in the park, gait is the most frequently used of all the movement patterns in our daily lives. This last movement pattern is a catch all for dynamic human movement and combinations of movements. For example, jumping, cutting, crawling, and other movements and combinations of movements can be added to this category.

Exercise Examples:

Walking
Jogging
Jumping

I hope this was a helpful overview that will help you think about exercise in terms of movement patterns, not just muscle groups. Your body will thank you as it becomes stronger, leaner, and better balanced.
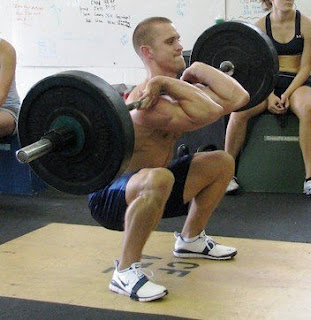
Wednesday, August 28, 2013

Squats Part 5(a) Low Bar Back Squat

This is the fifth Part of a series on Squats, the earlier posts can be found here: 

In the previous sections we've discussed that the back squat is a primal motion, it is not an invented exercise, it's something that we all do everyday in different forms.  While it is a basic movement when we load it with weights there are several points to make it a safe and efficient exercise.


The Low Bar Back Squat

The low bar back squat is often referred to as  Power Lifter style.  It is the form of squat recommended by .
Mark Rippetoe, in Starting Strength

When we do any functional weight training movement we want to bring as much muscle mass into the exercise as possible. The low bar back squat recruits more muscle mass then the high bar back squat or the front squat. While all of the squats train the glutes,  posterior chain and core stabilizers the low bar back squat recruits the hamstrings and glutes much more than the other two,  which place a much greater emphasis on the glutes.


Bar Path Concept

As the weight on the bar becomes heavier the center of gravity of your body and the bar approach the center of mass of the bar.  

Low Bar Back Squat
- More horizontal back
- Less knee bend, less quad activation
- More hip angle, more hamstring and glute 
  activation
In order to remain stable the the center of gravity of the load must stay over the the balance point, which in this system is the back 2/3 of the shoelaces.  Your foot provides the levers to keep you standing, with the ankle being the fulcrum, positioned toward the back of the foot.  The heel distance to the fulcrum(ankle) is much shorter than the distance to the toes. Because of this arrangement the center of gravity occurs about 2/3 back from the length of the shoe laces.  Imagine a slot positioned vertically and extending from a point 2/3 back from your toe on your shoelaces.  This is the path the bar must travel to remain in balance and aligned with your center of gravity. for the rest of this article will refer to this position has the middle of the foot.just remember, it is the middle of the whole foot the middle of the fore foot. Remember, think of a slot rising vertically from this point, this is the slot you want to keep the bar in the entire lift. 

If the weight is not balanced, leverage inefficiencies occur which will make the lift much harder to complete than the correct bar path would. Any deviation form our imagined slot will add inefficiency, difficulty to the lift in manner that will not benefit your training goals. 

High Bar Back Squat
- More vertical back
- More knee bend(More Quad Activation)
- Less hip bend(Less Hamstring and Glute 
  activation
This center of gravity concept also explains the difference back angles required for the high bar back squat and the low bar back squat. The high bar back squat is a more upright torso which is caused by the need to keep the bar over the center of gravity(or in our imagined slot). In the case of the low bar back squat back angle angle of rotation at the hips is going to be somewhat more horizontal, keeping the lower bar in the same imagined slot. You will bend at the hips creating more of an angle on the back(with respect to the floor - REMEMBER THE BACK ITSELF STAYS STRAIGHT) so that's a bar remains over the shoe laces(our imagined slot). 

Remember this is a angle created by bending from the hips not a flexion of the back. The back always remain straight the angle comes from rotation around the hips. As we will get to in the next post the front squat is a movement with an even more vertical angle on the back then high bar back squat due to the position of the bar in front and on the rack position.

Grip
The grip has your hands over the top of the bar.  You should be supporting no weight if the bar in your hands or arms, all of the weight is resting on your back. They are simply there for light positioning.

If flexibility will allow a narrow grip will help you to contract your upper-back more providing a padded rack toward the bottom shelf of your scapula. Some people will have difficulty with a narrow grip until shoulder flexibility improves. I will post more on shoulder flexibility in a future post.  In the mean time see Increase Shoulder Flexibility Fast with This Shoulder Stretch


Spotting the Back squat

For all practical purposes I DON'T believe the back squat can be spotted effectively.

You'll see two ways 

Behind with arms wrapped around the torso. 

  • Really, how much assistance can be given?
  • This just looks silly.

Two people on each side of the bar.
In practice, in my experience, two people on either side of the bar cannot lift at exactly the same time with exactly the same force, regardless of the level of communication.  This causes, however slight, a torsion on the bar, which is exactly the last thing you want when attempting to lift a too heavy weight.  Most back injuries are caused by torsion, twisting of the spine under load. 

Use a proper squat rack with safety bars or Bumper plates that you can dump.

I know this position on spotting the squat will be controversial.  I would appreciate any comments and am happy to entertain disagreement.  Please comment if you disagree,

This post will continue as Part 5(b) Low Bar Back Squat
After that we will tackle the Front Squat in Part 6 and try and wrap up Squats(For now) in Part 7

Previous Sections Can Be Found below:

Breaking Muscle Video - How to Maintain and Control a Handstand

Handstands are a great functional exercise.  Great for balance and proprioception. Here's a great video from Breaking Muscle Jon Kolaska 

Interesting Yoga perspective, as opposed to my usual brute force approach.  I like the grace, form and balance he adds. Also has me thinking of a more efficient wall climb.

This video will help you learn to maintain and control a handstand. If you are nervous about inversions, don't worry - the video starts with Downward Dog and how to kick up to the handstand.


The handstand is an amazing full body exercise. This video will help you learn how to maintain and control a handstand. I will go over the foundations of the handstand and some small details that will make a big difference in the balance and strength of your hold. For those of you nervous about inversions, don't worry - we start with Downward Dog and how to kick up to the handstand.

See also: Coach: Roger Harrell, Part 1 - Gymnastics for Adults

What Makes You Fat: Too Many Calories, or the Wrong Carbohydrates?

burger bun
Which is the more important cause of obesity: Eating too much food or eating the wrong kinds of food, especially easily digested carbohydrates?

Rigorously controlled studies may soon give us a definitive answer about what causes obesity—excessive calories or the wrong carbohydrates? 

See Also:


Optimizing Running Training Part 1

This series will look at using Ventilatory Thresholds, Lactate Threshold and Annaerobic Threshold Training to optimize your run training  This will be a fairly lengthy discussion, so I have broken it up into several parts.


DEFINITIONS: Terms can become very confusing  


Lactate Threshold

Lactate threshold is a speed, or percentage of V.O2 max at which a specific blood lactate concentration is observed or the point at which blood lactate concentration begins to increase above resting levels
The maximal lactate steady state is defined as the exercise intensity at which maximal lactate production is equal to maximal lactate clearance within the body. The maximal lactate steady state is considered by many to be a better indicator of aerobic endurance performance than percentage of maximum heart rate.

Ventilatory Threshold
Ventilatory Threshold is the ‘point of transition between predominantly aerobic energy production to anaerobic energy production.’ And if you want to get specific…then the first ventilatory threshold is ‘the intensity at which ventilation starts to increase in a non-linear fashion’ and the second ventilatory threshold is a further change in the respiration ratio curve.

Lactate threshold and Ventilatory threshold are closely related but are not exactly the same thing.  Lactate threshold is difficult to measure, requiring blood samples immediately after or during an event.  Ventilatory threshold is much easier to measure and gives a practical indication of Lactate threshold for training purposes.

But how do we measure VT1 and VT2? Research has found that the Talk Test provides an accurate measure of the body’s response to increasing intensity. Where before we relied solely on percentage of heart rate (We’ll discuss heart rate monitor training in an upcoming post), now physiologists have discovered that talk test relates very well to similar intensities.

Below VT1: you can speak comfortably, recite the alphabet etc.
At VT1: you can no longer speak comfortably; it requires some effort at this point
Above VT1/Below VT2: speaking is possible, but not really comfortable, you can’t recite the entire alphabet with ease at this point
At VT2: Speaking is no longer possible with the exception of one or two word statements, chances are you are not going to be able to exercise much longer above this point‘’.

How to Optimize Your Endurance Training Using Lactate Threshold and Anaerobic Threshold

The purpose of this discussion will be to describe the physiological mechanisms behind the lactate, ventilatory, and anaerobic thresholds, as well as discuss the heart rate threshold.  This will be used to outline training principles for the improvement of lactate threshold values in your training.

Lactate Threshold and Endurance Performance
Traditionally, maximal oxygen uptake (VO2max) has been viewed as the key component to success in prolonged exercise activities However, more recently researchers have proposed that the lactate threshold is the best and most consistent predictor of performance in endurance events. Research studies have repeatedly found high correlations between performance in endurance events such as running, cycling, and race-walking and the maximal steady-state workload at the lactate threshold (McKardle, Katch, & Katch 1996).  This research is what we will use to optimize out training.

What is the Lactate Threshold?
At rest and under steady-state exercise conditions, there is a balance between blood lactate production and blood lactate removal.  The lactate threshold refers to the intensity of exercise at which there is an abrupt increase in blood lactate levels.
Lactate threshold effects involve the following key mechanisms:
1) Decreased lactate removal
2) Increased fast-twitch motor unit recruitment
3) Imbalance between glycolysis and mitochondrial respiration
4) Ischemia (low blood flow) or hypoxia (low oxygen content in blood)

Next: Metabolic Pathways Overview

Tuesday, August 27, 2013

Squats Part 4 Back Squat

This is the Third Part of a series on Squats, the earlier posts can be found here: 

Any feedback or questions would be greatly appreciated.

In the previous sections we've discussed that the back squat is a primal motion, it is not an invented exercise, it's something that we all do everyday in different forms.  While it is a basic movement when we load it with weights there are several points to make it a safe and efficient exercise.

The back squat(high bar) is the typically the first barbell squat movement that most people are introduced to. The back squat uses a great deal of muscle mass, and because of this heavy weights can be lifted which will lead to greater adaptation.  Squats are a full body exercise with much more muscle used than the leg muscles Quad, Hamstrings and glutes.  The mass be supported and stabilized, thus putting a high demand on the core.

In the back squat, either form, you will be lifting more weight than in almost any exercise except the dead lift.  You'll want to use the right equipment and check to make sure that it is set up properly. 
Power Rack

Squat Rack 

Power rack, 4 sided will have safety bars that can be placed between the uprights.

The safety bars should always be used.
To use you will set the side safety bars to catch the bar just below the bottom point of your squat.  If you cannot complete the lift you simply dump the weight the short distance to the safety bars.

Please note that this is not a Smith Machine.  The Smith Machine has a rail or guide on which the weight rides.  The Smith Machine takes all of the stabilization work from you and you are placed where your movement must conform to the machine.  This is not a natural movement and training with the Smith Machine can hardly be called a squat.  Where ever possible avoid constrained motions like the Smith Machine and use a free unguided movement.  

Globo gyms and clubs like Smith Machines because they perceive them as safer.  This is a myth, a properly executed squat with appropriate equipment and appropriate load is perfectly safe.
Squat Stand

Squat stands, which have no safety bars can be used if you are using bumper plates, rubber plates made specifically to allow you to dump the weights to the floor, a practice frowned upon in big box gyms and health clubs, but embraced in most true weightlifting gyms, Crossfit Boxes and other gyms that specialize in free weights. 

Shoes

While this seems a minor consideration it can have a large impact on your movement and the reaction forces against the floor.

Shoe lift (the difference in elevation between the back and front) will help with squat depth.  That is why you will see lifting shoes with a relatively high heel,  

This heel has two purposes: .  
1. To lock and and provide stability of the foot.
2. To raise the heel so that ankle mobility is not the limiting factor in squat depth.
These shoes also have no, (or very little), padding to absorb shock. The point of this is that all of the muscle-mechanical force you exert is directed to moving the weight rather than having some portion of that effort dampened by shock absorbing materials like those typically found on cross-trainer or similar shoes. This does have a large effect in the squat and even more so in Olympic lifts. 

General Characteristics of Back Squats

There are two types of back squats.  Most people when they think of back squats think of the high bar back squat.  The low bar back squat is more common in sports performance training and offers some unique characteristics.  

Both types share the following Characteristics


Start with an empty bar about sternum high on a power rack.  Load weights on both sides.

Make sure it is centered in the rack.

Make sure you are facing the bar.  NEVER back into the bar.  ALWAYS face the bar.  When the weights get heavy and you have backed into the bar and attempt to return the bar to the rack you can't see the supports.  There will be a train wreck when you miss the supports.  You would also have to turn and twist to even try to find the supports, putting torsion on you spine.  This is the LAST thing you want to do under a heavy load.  ALWAYS FACE THE BARBELL

Grasp the bar with a closed, palm forward grip .  Width will depend on shoulder mobility.

We'll discuss bar placement on your back and grip when we talk about the specifics of each because it will be different between the high bar back squat and the low bar.  Both styles require the shoulder blades to be contracted and retracted.

Head should be in a position that maintains the cervical spine in a neutral position, in line with your thoracic spine.  SO at the start it is up with eyes straight forward.  As you begin to move your neck should follow your spine, this will have your eyes then looking at a point on the floor or wall in front of you slightly below the horizon and you move downward.

Your Torso should be straight, back straight and abdominals braced.

Once braced, take 1 step back.

In both movements your shoulder blades should be pushed together and retracted.

Feet shoulder width apart,  or a bit wider.

Screw your feet to the floor in external rotation. We will have a separate post on external rotation in a future post.  For more on external rotation see also Becoming a Supple Leopard by Kelly Sterrett.

Feet flat on floor and toes pointing slightly outwards at an angle between 15 deg and 30 deg depending on mobility.  See here discussion of foot position.

Inhale and hold your breath while lowering the bar. We will have a separate post on breathing, bracing and the Valsalva Maneuver in a forthcoming post. 

Knees and hips bend bend together, shins stay as vertical as possible, moving slightly outward(external rotation) always tracking over the shoelaces.  Think knees out.  Never let them collapse inward.  

Sit back over heels, weight is appropriately distributed over center of gravity.  Think pushing through the heels. 

Think of the torso as dropping through the hips.

Move downward in a controlled movement, stop at the bottom and immediately drive the weight back up pushing through the heels.

High Bar Back Squat

This is often referred to as Olympic style.

In the high bar back squat the bar rests across the back of shoulders, deltoids and traps.  Back is straight and inclined form the hips to keep the load balanced over the lifters center of gravity (think the back two thirds of the shoe laces). 

Because bar is higher on your traps than in the low bar position, your torso is more upright, you may be able to squat more deeply.

Grasp the bar with a closed, palm forward grip (actual width depends on the bar position). The hands should be spaced evenly and slightly wider than shoulder width apart. A narrower grip, requiring more shoulder mobility will allow the shoulder muscles to provide a padded shelf for the bar. The elbows should be pointing down and back.  Pointing them back will help raise the deltoids to support the weight.

High bar squats result in a relatively more forward knee placement than the low bar back squat resulting in a more acute knee angle. This squat variation, in comparison to the low bar squat position placed relatively more load on the quads than the hamstrings and glutes.  Though the knee moves forward it should also move outward and follow the line of the shoelaces.  It should not past the toes.

As in all squats the hips and knees should work together.  Think sitting with rear end out and torso passing through the hips.

Comparison of the High Bar Back Squat to the Low Bar Position

  • You may be able to squat deeper because of the relatively more upright position of the torso.
  • Quads receive relatively more load.
  • This may feel like a more natural movement than the low bar position.


Next we will continue with and in depth look at the Low Bar back Squat.


References and Additional Reading
McARDLE, W. et al. (2000) Essentials of Exercise Physiology. 2nd ed. Philadelphia: Lippincott Williams & Wilkins

Monday, August 26, 2013

HUGELY Controversial Article Entitled: Fallacy of High Rep Olympic Lifting by Mark Rippetoe

Fallacy of High Rep Olympic Lifting
T-Nation Articles - 10 hours ago


From Mark Rippetoe: "High-rep Olympic lifting is rising in popularity largely do to CrossFit.
But is it a smart way to train?"

As usual Coach Rippetoe weighs in with a controversial opinion.

I will be doing a detailed examination of his points and some counterpoints.

Any reader comments would be greatly appreciated,
particularly from the Crossfit Community.

UPDATE:  Be Sure and see:

Counterpoint to the Rippetoe Article: The Not-So-Evils of High Rep Weightlifting

Poetry in Motion: Kendrick Farris

Kendrick Farris' Clean and Jerks at the 2013 World University Games


This is just poetry in motion.

I cannot wait to see him in the Olympics 2016!

Interesting Article About Training Athletes

Here's a great article about Training Athletes, 


by Erick Minor from TNation.

Darvis Patton, U.S. Olympic sprinter

I like the concept of isolation exercises as an assist for working on muscle weaknesses in full compound lifts. Just not as the main component of the entire workout program.

I am not sure I agree with all of the points in the article.

He does seem to have a bone to pick with Trainers.

I somewhat disagree with the Total Body Training doesn't build mass myth.  I believe it does and builds proportionate useful muscle that isolation work cannot.  His point is that there is a lack of hard evidence that this works.  The absense of scientific proof does not invalidate total body training as valid.

I will develop my thought and post them here.

Any thoughts?  Please comment.

Quick Question.

So I am now experimenting with running Google Adsense on this Blog.  I am hoping to get some comments, do you find the ads distracting?  Do the ads seem relevant?

Saturday, August 24, 2013

Squats Part 3: Air Squats and Goblet Squats

This is the Third Part of a series on Squats, the earlier posts can be found here: 


Squats Part I
Squats Part 2 General Mechanics

Any feedback or questions would be greatly appreciated.


If you take nothing else from the previous posts, remember 
Squats are a basic primal human movements.  Squats won't hurt your knees, but how you do them can.

Air Squat

This is simply an unweighted squat.  All of the  principles discussed in general mechanics apply with the back remaining relatively vertical.  Arms are often swung forward during the downward movement to help provide a counter balance.

The air squat develops the hamstrings, thighs, adductors, abductors, hips and glutes, while engaging your core. It builds size and strength in the legs and posterior chain, helps develop the core and the muscles that support the back.

Air Squats are no joke and can be done for reps for cardio vascular, metabolic and stamina work.  The classic and very demanding Crossfit(TM) workout "Murph" (named after Micheal Murphy who was a United States Navy SEAL lieutenant, killed in the War in Afghanistan and the first person to be awarded the U.S. military's highest decoration, the Medal of Honor) includes 300 air squats.

Getting Started

A Beautiful Air Squat
Stance: Heels under hips, slightly beyond shoulder width. Toes slightly out (see previous discussion of toes out v. toes straight and external rotation).

  • Keep your chest high, back vertical to slightly angled forward, (NOT ROUNDED FORWARD) adjusting at the hips for balance.  Vertical is relative to the back squat which will have more angle. 
  • Neck and head in line with your spine
  • Move your hips back
  • Squat down until hip crease is below knee crease, ass close to Ass to Grass as possible.
  • Return to standing with your hips fully extended.

Progressions

Progressing to a full air squat 
Box Squat
Chair Squat

Progressing beyond the air squat

Hands on your head
Hands held vertically over your head - this seemingly simple change adds a great deal of core stabilization to the work and tend to be much more difficult than standard air squats.
Pipe or dowel on shoulders or overhead to begin the progression to barbell work.

Even though this is a simple movement, when done for reps, multiple reps, say 10-20 over multiple sets it can become quite metabolically/ aerobically grueling.  Don't underestimate them and air squats are a great place to start, and a great way to perfect your technique.


Goblet Squat

Often this is the next progression from the air squat.  Typically done with a kettlebell, however kettlebells are by no means required and a proper goblet squat can be achieved with a standard dumbbell.  This is typically the first weighted squat progression I teach trainees who are new to squatting and are perfect when the 35 lb trainer bar or the 45 lb Oly bar are too heavy.

Goblet Squat with dumbell.  Knees
could be farther out here.
This is simply a Front Squat variation, with the load travelling in a straight line slot over the back 1/3 of the shoelaces. The kettlebell is held as close to the mid line of the body and the back tends toward vertical.

Hold the dumbbell vertically or if using a kettlebell grasp it by the horns and if holding a goblet to your chest, hence the name Goblet squat.

Start with the dumbbell or kettlebell held right up against you chest.

Feet about shoulder width apart or a little more if you have the mobility.

Feet should be slightly turned out 15-30 degrees.
See: The controversy with respect to foot position.  While having read many articles I still recommend feet turned out.  Until adequate depth and external rotation(to be covered in detail in a future post) can be developed with a feet straight approach use the feet out approach.  The key is KNEES OUT(Externally rotated) don not allow you knees to cave inwardly.

Kettlebell Goblet Squat
Good knees out position.
Keep the dumbbell or kettle in an imaginary line over the back 2/3 of your shoelaces.

As you start down lower your torso through your hips.  Don't bend forward.

Lower completely or as far as your mobility will allow. Think "Ass to Grass".

At the bottom of the squat let you elbows fall inside your knees and use them to push your knees out.  This is one special aspect of the squat, you can work on opening your hips by pushing your knees out with you elbows.  Next to back straight, knees out is the most important thing you can be thinking.

Don't feel like you have to hang our in the bottom position. Come down, hit bottom and come right back up.  You body has a stretch reflex (to be covered in detail in a future post) use it. It is also highly trainable and particularly important for jumping.

Goblet Squats are perfect for progressing to higher reps for cardio and lactate threshold training as well as basic strength.


Part 4 of this series will begin examining the back Squat and Contrast it to the other types of squats.

Upcoming Part 4 Back Squats


Recommended Resources:
Starting Strength 3rd ed.: Chapter 1 & 2, Mark Rippetoe
Becoming a Supple Leopard: The Ultimate Guide to Resolving Pain, Preventing Injury, and Optimizing Athletic Performanc
Anything by Dan John, he basically invented the Goblet Squat

Additional Related Reading
8 Reasons to Do This Misunderstood Exercise


Most Popular Articles of August (Top 5)

EntryPageviews
5934
Sep 6, 2013, 
2994
Sep 7, 2013, 
2413
Aug 22, 2013, 
2219
1914

Thursday, August 22, 2013

Squats Part 1

This idea of a functional fitness and performance blog is to deal with functional exercises and movements. There are many definitions of functional exercise.  See Wikipedia Functional Training. What I mean by functional movements are generally closed chain exercise wherein one extremity, typically the hands or the feet remain in constant contact with a surface (ground, bar, etc).  This is in contrast to open chain exercises (such as the leg press, where the extremity (distal end) is free to move against a resistance.


Note: My above partial definition is only a starting component of what I mean by functional fitness and will grow and evolve as I develop my thoughts in this blog.
The idea of open chain v. closed chain exercise is possibly most easily recognized in the Squat versus the Leg Press.  In the squat the feet remain fixed against the ground and the weight moves through a combination of leverage from the hips and knees, as a whole body movement. Conversely in the leg press your butt is seated and your feet move through the air against a platform, the activity occurs from the hips down guided by the machine rails with no full-body stabilization component.

Closed chain movements are typically compound movements using many muscle groups to both lift the load and to stabilized the body.  Most open chain exercises (machines) provide the stabilization for you, eliminating that very functional component of the movement.

Movements that require you to move you body through space(closed chain exercises/movements) involve a higher level of neuromuscular activation, balance and core stabilization than those where you are simple moving your limbs(open chain exercises/movements).

Closed chain exercises typically:
  • use more muscle groups than open chain.
  • require much greater motor control and neural stimulus (To be discussed in much greater detail in a future post)
  • more closely mimic natural movements and those we perform in our everyday lives
  • may be safer for joints as agonist and antagonist muscle group action  (To be discussed in much greater detil in a future post)
  • more closely relate to our activities of daily 
One of the most functional movements you can do is the Squat.

It's something we do every day of our lives when we sit or stand in a chair, get up or down off of the toilet, pick up a load with our arms or shoulders, etc.

Why do so many people think that they cannot do squats?

Right off let me say I was one of them.

At the time I considered myself to be primarily a runner.   I was focused on adding weekly miles 20 miles, 30 miles per week,  that kind of thing.  Some days after a run my knees were so sore I had trouble getting out of the car, getting up and down the stairs. That was no way to live, let alone express my level of fitness.   I mean what was it for if I couldn't get up and down stairs well?

Squats are hard.  There's no comfy bench or chair to sit on. The leverage and stability all has to come from you, there is no machine, cam, or guide rail to take or control some of the load for you.  All the stability must come from you, this makes squats one of the more difficult movements you can do and at the same time one of the best.

Look, for example, at the seated leg press,  there is a comfy chair angled at typically 45 degrees to match the guide rails which are similarly angled.   At 45 degrees the guide rails take HALF of the load off of you.   You are in effect moving 1/2 of the load horizontally not vertically against gravity.   Because of this, people can often leg press(I wouldn't exactly call it lifting) MUCH more weight than they can truly squat. It looks very impressive until they are stuck somewhere without the chair and guide rails and actually have to lift a load with their legs, with their back, hips and core lacking the stability that would have been trained in a propoer squat.

On machines the core stability requirement is handled by the machine, no need to work on that aspect of your development.


Why physically do people(who want to do squats) have trouble with squats?

I mean babies can squat, what happens?


Add caption
One BIG reason:  many people today are primarily sedentary.

As we sit chairs at work our hamstrings are in a shortened position and will become tight and weak at their full natural position, our hip flexors become tight, shoulders tend to round forward and arms internally rotate, the back hunches forward and the neck cranes forward.

Sitting leads to many of the mobility problems we see in the gym.  Passive stretching is not enough.  The best way to prove tightness, muscle imbalances, posture and flexibility is to do full range resistance exercises.  It is not enough to stretch a muscle we also want to become strong at the stretched range to avoid injury and build posture control.  


Upcoming Part 2 Squats, General Mechanics and How to do them SAFELY


Recommended Resources:
Starting Strength 3rd ed.: Chapter 1 & 2, Mark Rippetoe
Becoming a Supple Leopard: The Ultimate Guide to Resolving Pain, Preventing Injury, and Optimizing Athletic Performanc

Additional Related Reading
8 Reasons to Do This Misunderstood Exercise

Contact Form

Name

Email *

Message *